Installing SmarterStats
In this chapter we’ll walk you through the basic installation process for SmarterStats 5.x, and also show you how to run SmarterStats on IIS instead of its built-in server, for better performance.Ingredients
- 2 cups diced onions
- 1 SmarterStats 5.x Download, License
- 1 SmarterTools Username & Password
- 1 website/app pool setup in IIS7
1. If your received a SmarterBundle from SmarterTools with your dedicated/VPS purchase from us, you will need to locate the download and licensing email you received from SmarterTools. This email will provide you with the direct URL to download the latest version of SmarterStates. Alternately, you can visit the SmarterTools website and locate the SmarterStats product page to find the download location. Be sure to visit the download location with your server’s web browser.
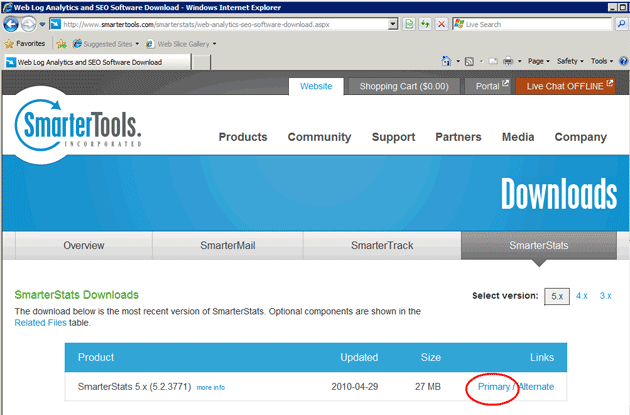
2. Once you download the file, click “Run.”
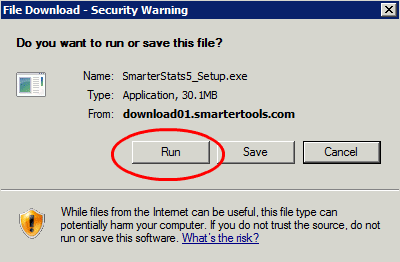
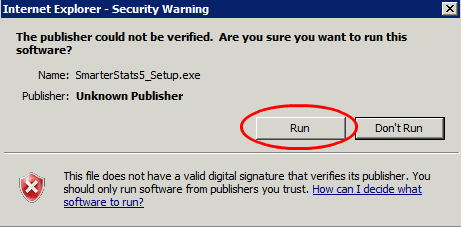
3. You may encounter a security warning confirming that you do, in fact, wish to run the software. Click “Run.”
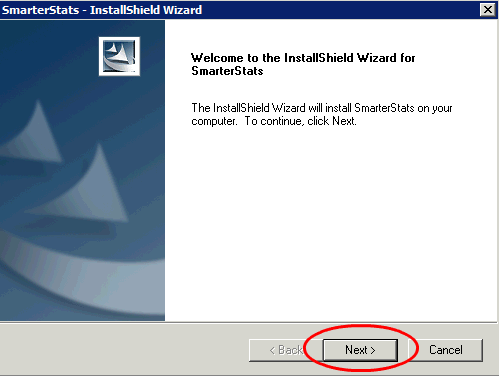
4. Once the SmarterStats wizard appears, click “Next.”
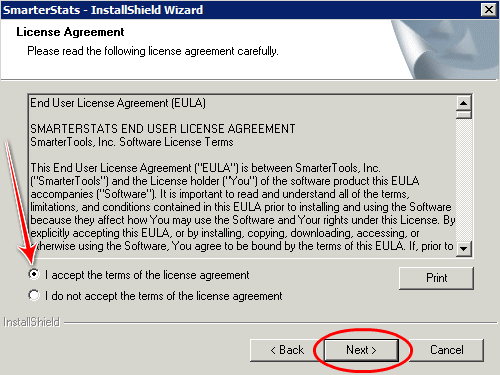
5. You will then need to Accept the terms of the license agreement, then click “Next.”
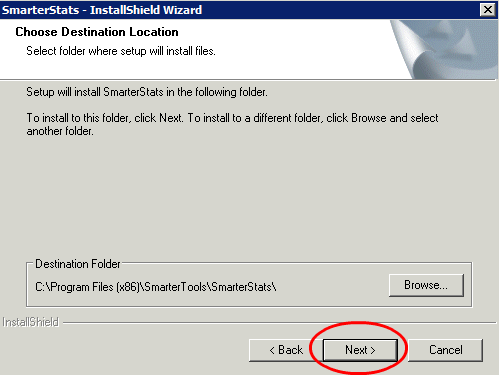
6. Next, you can select a destination folder for the installation, or click “Next” to use the default location (recommended).
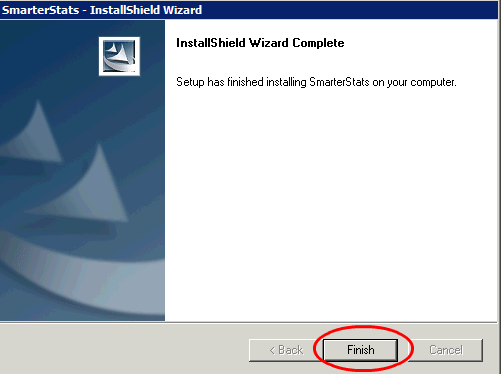
7. Once the wizard is complete, click “Finish.”
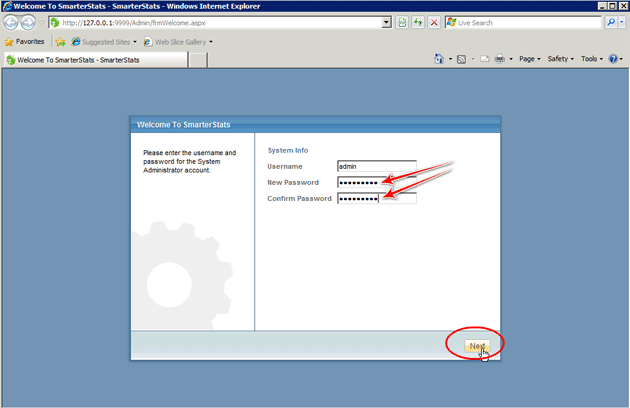
8. A new browser page will open, letting you know that SmarterStats is initializing, after which you will be prompted with a Welcome screen. From here, you’ll need to provide an admin Username and Password for your SmarterStats installation. Once you provide the user information, click “Next.”
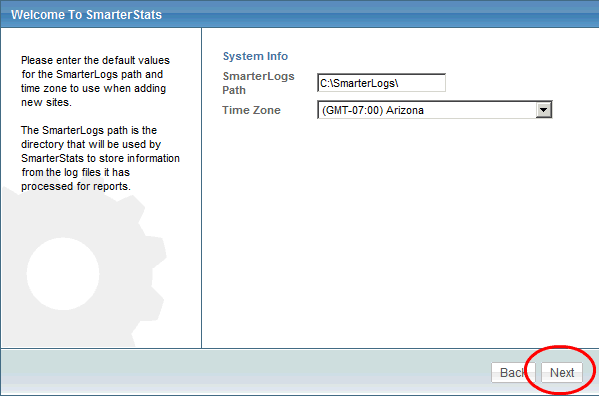
9. Next, leave the SmarterLogs path and select the appropriate Time Zone from the dropdown. Then click “Next.”
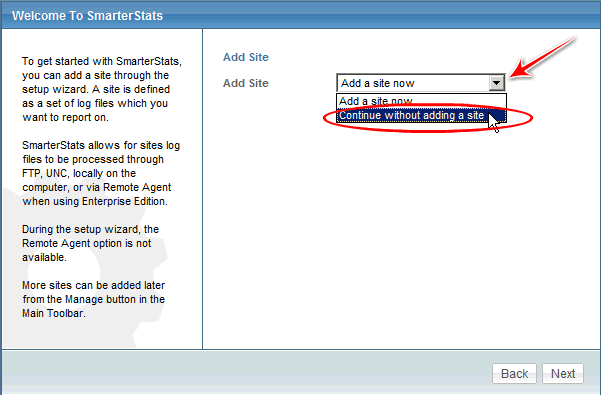
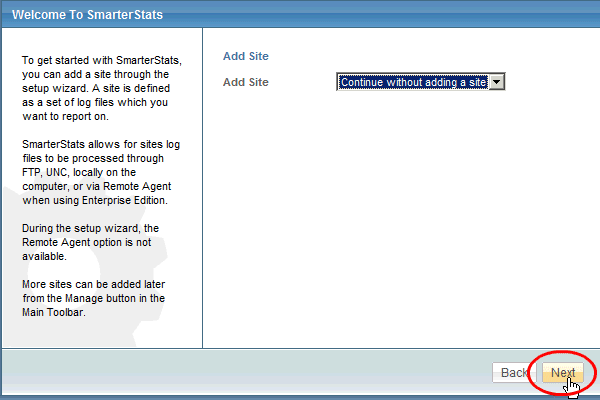
10. On the next step, you will be prompted to “Add a Site.” Because we will be adding sites through WebsitePanel, you can select the option “Continue without adding a site” from the dropdown.
11. Then click “Next.”
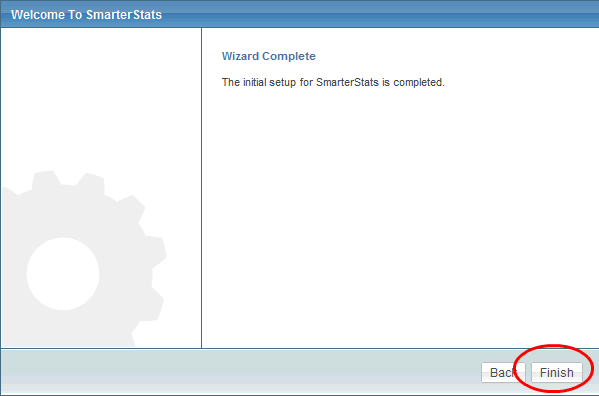
12. The initial setup for SmarterStats is finished at this point. Click “Finish.”
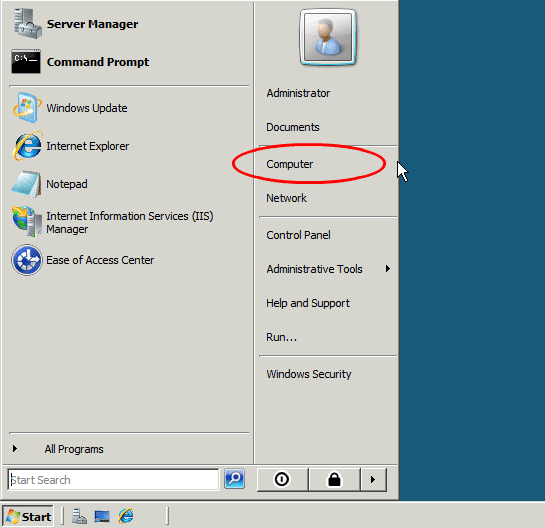
13. Now, for better performance, we’ll want to turn off the built-in web server for SmarterStats and then configure it to run in IIS. To do this, go to your server’s start menu, then click “Computer.”
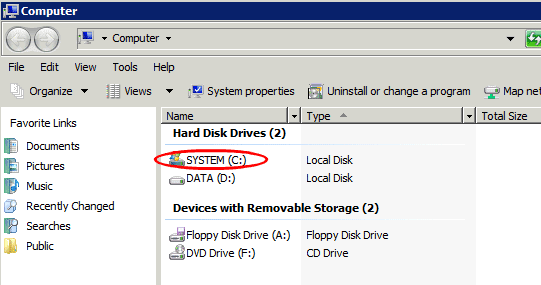
14. Double-click “SYSTEM (C:).”
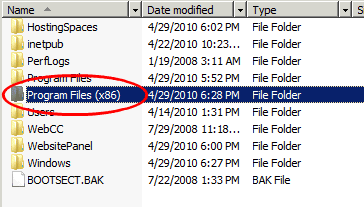
15. Double-click “Program Files (x86).”
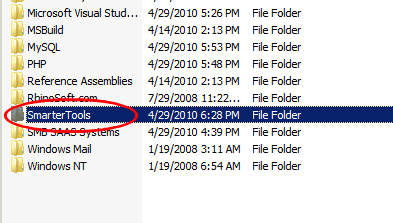
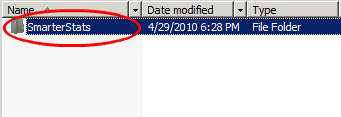
16. Double-click “SmarterTools.”
17. Double-click “SmarterStats.”
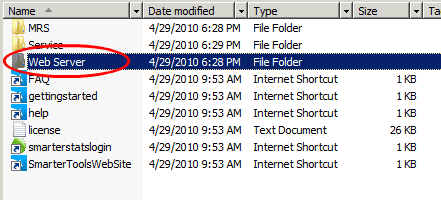
18. Double-click “Web Server.”
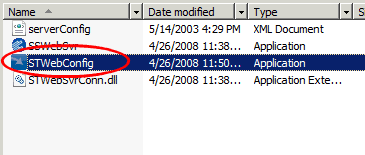
19. Double-click “STWebConfig.”
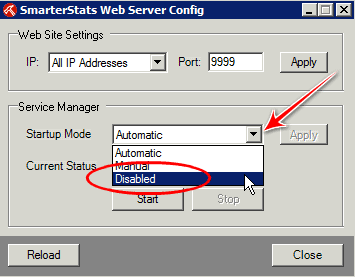
20. On the “Web Server Config” dialog box, click “Stop.” This will stop the SmarterStats web server.
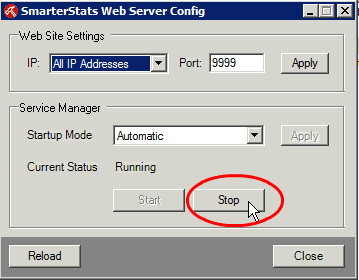
21. On the “Startup Mode“ dropdown, select “Disabled.”
22. Click “Apply.”
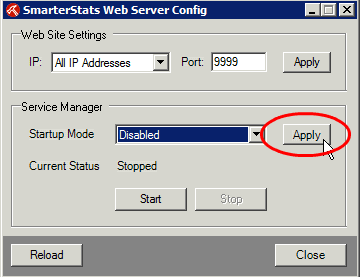
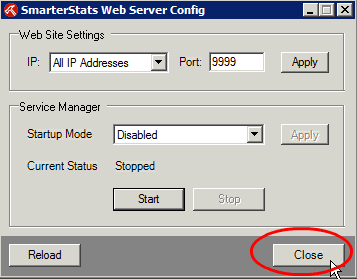
23. Click “Close.”
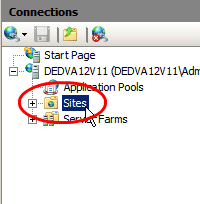
24. Open up (or go to) IIS Manager, which you can reach from the Start Menu > Administrative tools.

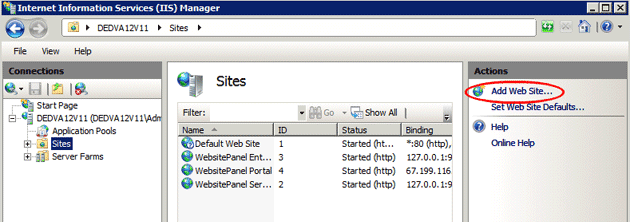
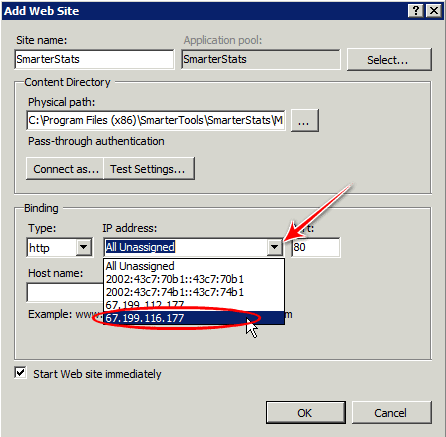
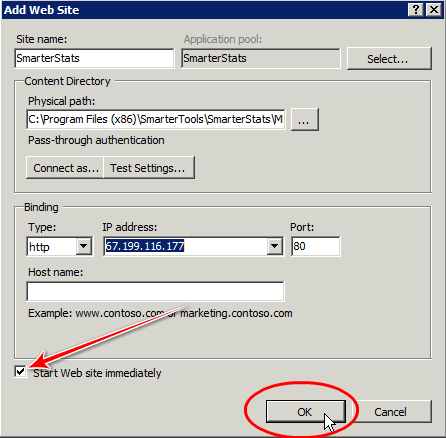
25. In IIS Manager, on the Connections pane, click on “Sites.”
26. On the Actions pane, click “Add Web Site…”
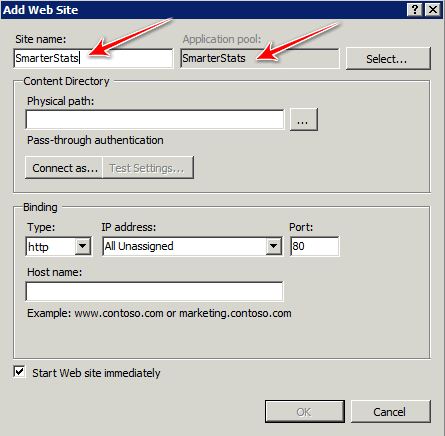
27. On the “Add Web Site” dialog box, enter in SmarterStats for the “Site name“ field. The “Application Pool” field will auto-populate with the same name.
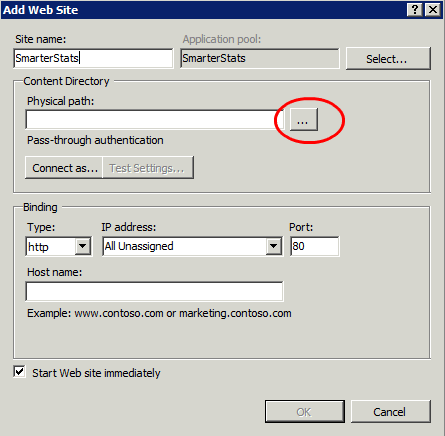
28. For “Physical path,” click the browse button.
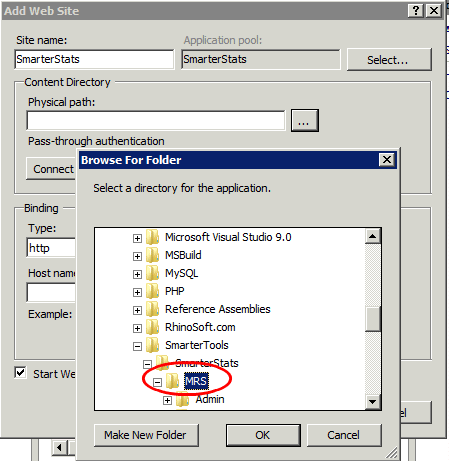
29. Browse to C: > Program Files (x86) > SmarterTools > SmarterStats > MRS. Then click OK.
30. Under the “Binding“ section, select your Machine IP address (the same IP address you used for the WebsitePanel portal) from the dropdown. Note that the port number is “80.”
31. Click “OK.“ Be sure that the checkbox for “Start Web site immediately” is checked.
32. Using a web browser that is not located on your server, visit http://your-machine-IP:80, where “your-machine-IP” is the IP address you used to set up SmarterStats in IIS. For example: http://67.199.116.177:80. Don’t for get to specify the port “80” in the address.
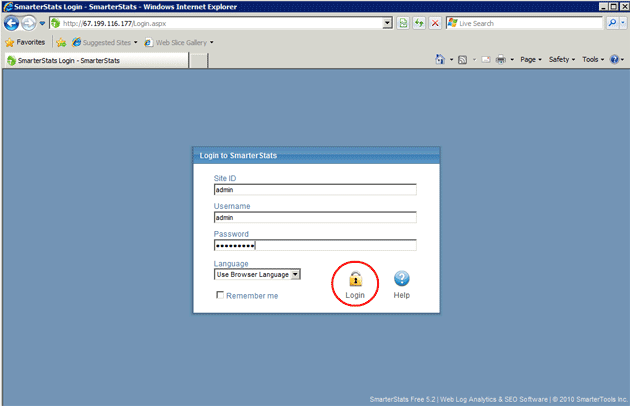
On the login page, enter in “admin” for the Site ID, the username you set up for the System Administrator, and the password. Then click Login.
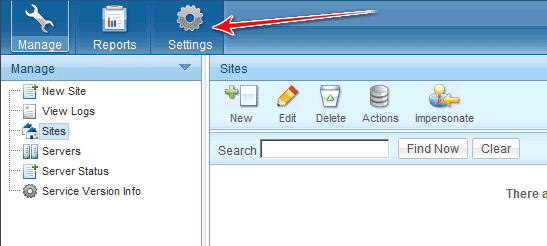
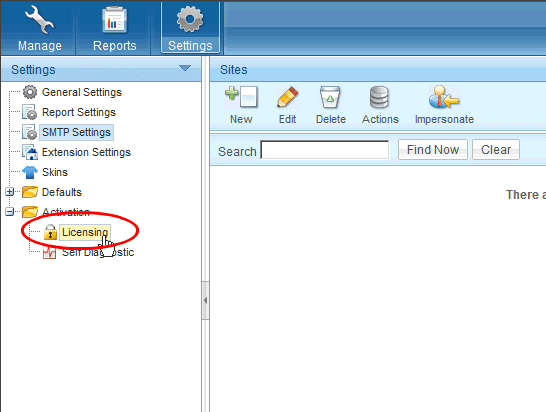
33. Go to “Settings.”
34. Expand the “Defaults” node, then expand the “Activation” node, then select “Licensing.”
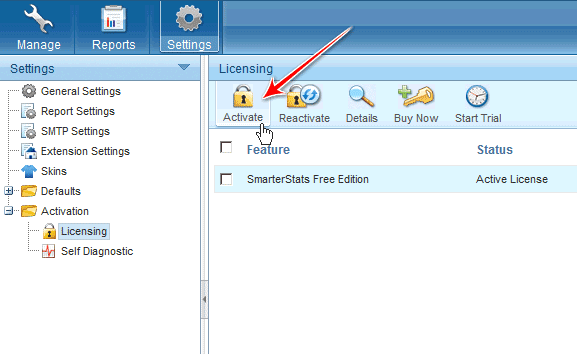
35. Click “Activate.”
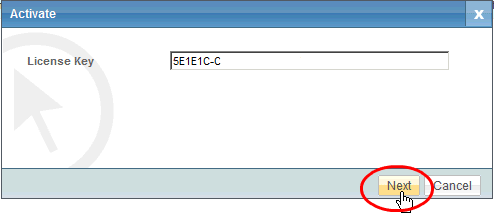
36 Enter in your SmarterStats license key, which is located on your SmarterBundle email from SmarterTools, then click “Next.”
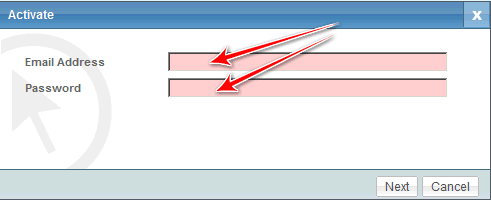
37. Provide the email address and password associated with your SmarterBundle, which is also located in your SmarterTools email, then click “Next.”
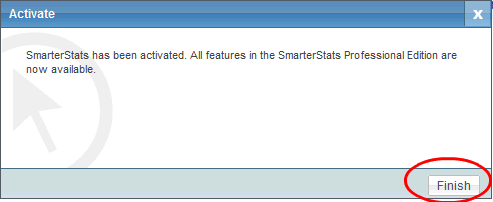
38. Your SmarterStats license is now active; click “Finish.”
♦ ♦ ♦